How to Set Up an Exercise Bike: Seat, Handlebars, and Pedals
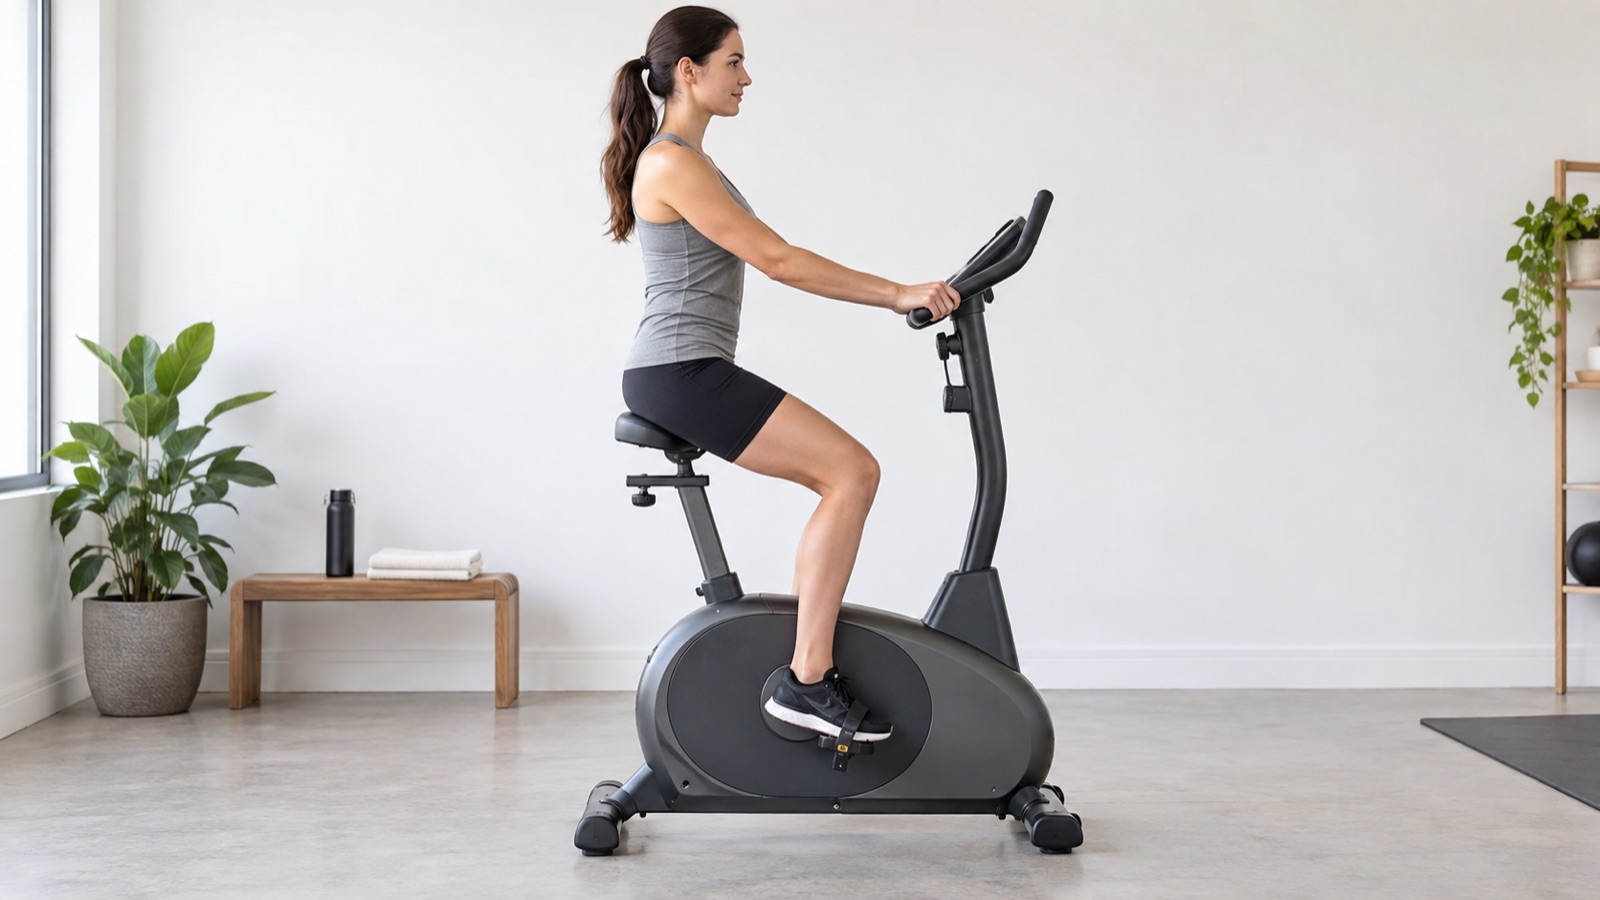
The short answer: begin with the saddle near hip height, then pedal slowly. At the farthest point of the stroke your knee should retain a slight bend, your hips should stay level, and you should not reach with your toes. Set the handlebars high and close enough that your shoulders remain relaxed and your elbows stay softly bent.
Those are starting checks, not a medical bike fit. Exact adjustments depend on the bike's geometry, crank length, pedal system, your mobility, and your training position.
Before You Adjust the Fit
- Stabilize the bike. Put it on a firm, level surface and adjust the leveling feet until it does not rock.
- Check the limits. Find the seat, handlebar, and user-weight ranges in the manual. Never raise a post beyond its minimum-insertion mark.
- Stop before moving a clamp. Dismount, stop the pedals, and release your weight from the saddle before adjusting it.
- Lock every adjustment. A pop-pin must enter a hole fully; a lever or knob must be tight enough that the post cannot rotate or slide.
- Start with low resistance. Make the first fit check at an easy pace where you can notice rocking, reaching, or joint discomfort.
Set Saddle Height on an Upright or Indoor Bike
- Stand next to the bike and set the saddle approximately level with the top of your hip as a rough starting point.
- Sit squarely on the widest part of the saddle and place your heel on the pedal.
- Move that pedal to the bottom of its stroke. Your leg should be straight without your hip dropping or reaching.
- Return the ball of your foot to the pedal. You should now have a slight knee bend at maximum extension.
- Pedal slowly for 30 to 60 seconds. Lower the saddle if your hips rock or your toes reach; raise it if the knee remains deeply bent at the bottom.
Concept2 uses this heel-on-pedal test as a starting point for the BikeErg. It is more useful than copying another person's seat number because it accounts for your leg length on that machine.
Set Saddle Fore-Aft Position
Not every home bike has a horizontal saddle adjustment. If yours does, start with the crank arms horizontal and your hands in the position you will normally use. A common manufacturer starting check places the forward knee roughly over the center of the forward pedal.
Treat that as a setup reference—not a universal law. Move the saddle only within its marked range, make one small change at a time, and prioritize smooth pedaling without sliding forward, crowding the handlebars, or straining to reach them. Recheck saddle height after a large fore-aft change.
| What you notice | Adjustment to test | Check first |
|---|---|---|
| Knees feel crowded at the top of the stroke | Move the saddle slightly back if the bike permits | Saddle may also be too low |
| You slide toward the nose or brace heavily on the bars | Move the saddle slightly forward or shorten reach | Saddle tilt and handlebar distance |
| Hips rock at the bottom | Lower the saddle in a small increment | Confirm the seat is locked and level |
| Knees stay very bent at the bottom | Raise the saddle in a small increment | Do not exceed the post limit |
| One-sided pain or persistent numbness | Stop rather than chasing the symptom with repeated changes | Consult a qualified bike fitter or clinician |
Set Handlebar Height and Reach
For a comfortable general-fitness position, begin with the bars at or slightly above saddle height. You should be able to hold your normal grip with relaxed shoulders, a neutral wrist, softly bent elbows, and no need to slide forward on the saddle.
- Raise or bring the bars closer if you are new to cycling, have limited trunk mobility, or cannot maintain the position without rounding and shrugging.
- Lower or extend the bars only when the bike permits it and you can support the position without locking the elbows or loading the hands excessively.
- On moving-arm air bikes, set the seat before judging arm reach. The shoulders should not be pulled forward at the far point of the handle path.
- A screen position is secondary to fit. Do not distort your riding posture simply to view a display.
Position Your Feet and Secure the Pedals
- Place the widest part of the forefoot over or close to the pedal axle as the pedal design intends.
- Tighten toe cages or straps enough to prevent the shoe from lifting or sliding, but not enough to compress the foot.
- Tuck loose laces and keep wide pant legs away from the crank.
- For clip-in pedals, confirm cleat compatibility and practice clipping out while stationary with support nearby.
- Stop if a pedal, crank, strap, or cleat is loose. A fit adjustment cannot correct damaged hardware.
How to Set Up a Recumbent Exercise Bike
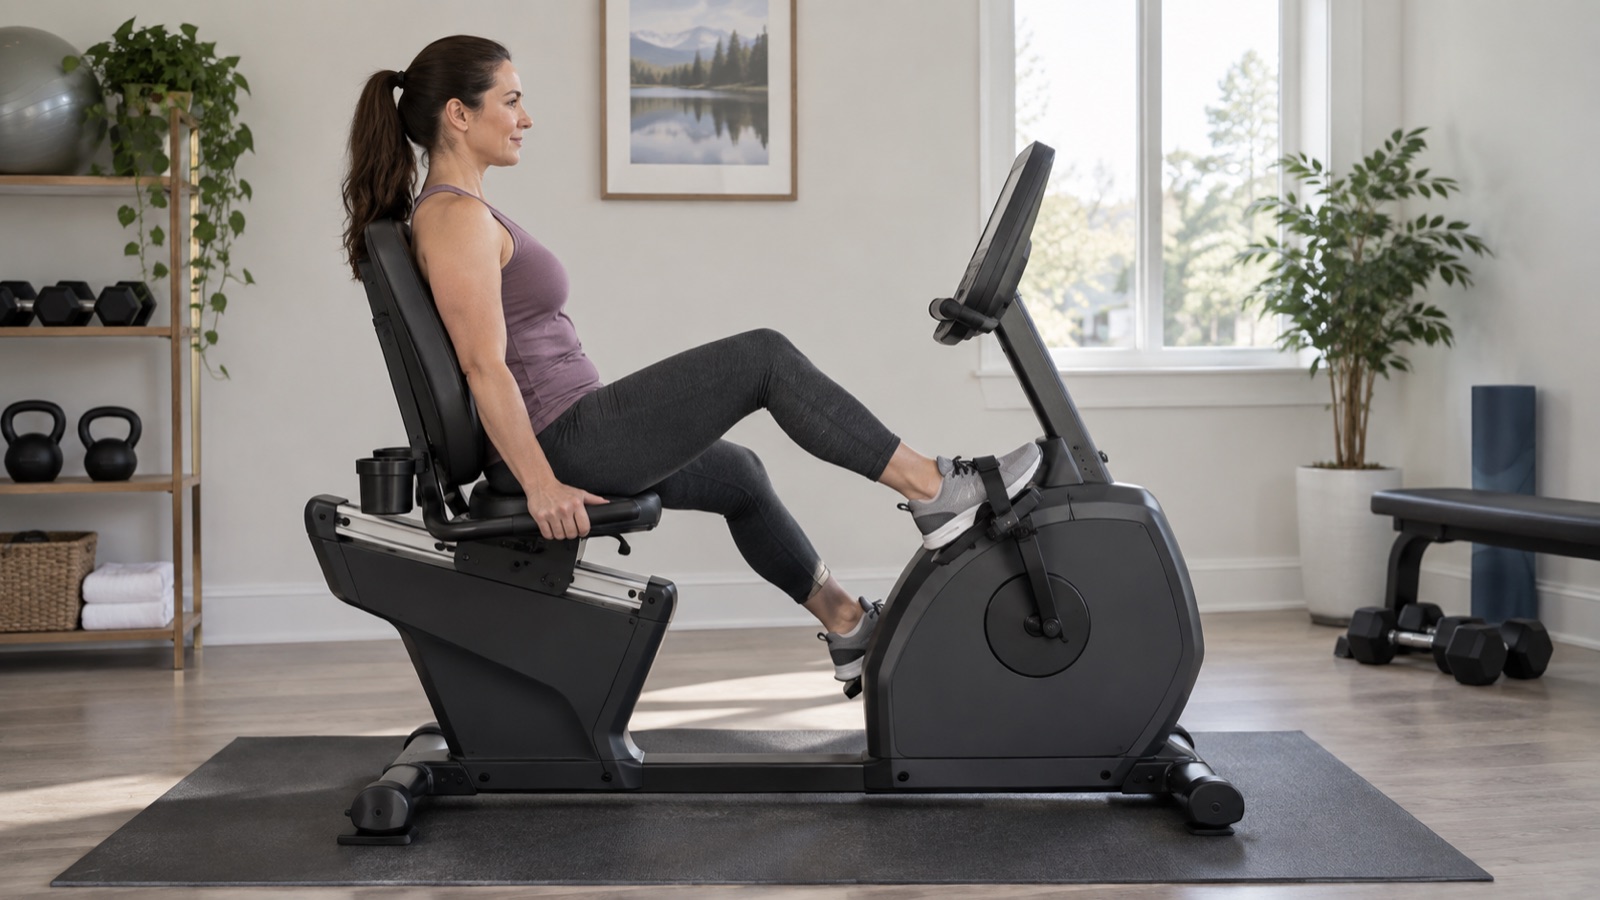
- Sit with your pelvis fully back and your back supported.
- Move the seat until the farthest pedal position leaves a slight knee bend.
- Confirm you can complete the stroke without your hips shifting, your pelvis rolling forward, or your knee locking.
- Center each foot and secure the straps.
- Lock the seat carriage, then pull and push the seat to confirm it cannot slide.
Life Fitness uses the same practical end point for its recumbent bikes: slight knee flexion without reaching or shifting the hips. Because the seat travels horizontally, the check is performed at the farthest pedal position rather than directly below the saddle.
Use a Five-Minute Setup Test
Ride easily for five minutes, then answer four questions: Do the hips stay level? Can the knees track without brushing the frame or flaring to reach? Can the hands stay light? Are the feet secure without numbness?
Change one setting by one increment, record it, and repeat. Stop for sharp pain, new numbness, dizziness, chest pain, or a joint symptom that worsens with each pedal stroke. Persistent discomfort needs an in-person fit or clinical assessment, not an endless sequence of internet formulas.
Sources and Manufacturer Guidance
Requirements can vary by product, model, and situation. These primary sources informed this guide; official instructions for your exact product and current authoritative guidance take priority.
Frequently Asked Questions
-
Use hip height only as a starting point. The better check is a straight leg with the heel on the bottom pedal, which becomes a slight knee bend when the ball of the foot returns to the pedal.
-
Not necessarily. Beginners and comfort-focused riders often start with the bars at or above saddle height. Lower bars create a more forward position and should be used only when mobility and comfort support it.
-
The saddle is commonly too high or too far back, causing you to reach at the bottom. Lower it one small increment and retest; also confirm the bike is level and the saddle is locked.
-
Far enough that the knee remains slightly bent at the farthest pedal position while your hips and back stay against the seat. You should not lock the knee, point the toe, or slide forward to complete the stroke.
-
Do not adjust a seat while pedaling or while your weight loads its mechanism. Stop, dismount, make the adjustment, and confirm the pin or clamp is fully locked before riding.