How to Anchor Resistance Bands Safely
The safe sequence is: inspect the band and anchor, use a structural point or manufacturer-approved door anchor, position a door so your pull keeps it closed, lock it when possible, test the attachment with low tension, and keep your face and bystanders out of the band’s recoil path.
A door handle, lightweight furniture leg, towel bar, sharp post, or improvised knot is not a dependable anchor. If the band, strap, stitching, door, frame, or fixed anchor shows damage or movement, stop before loading it.
What Can Fail in an Anchored-Band Exercise?
There are four links in the setup: the building or rack, the anchor, the elastic band, and your grip or cuff. A failure at any link can send the band or hardware back along the line of pull. Published eye-injury case reports describe facial and ocular trauma after elastic bands slipped or broke, while physiotherapy safety guidance warns about recoil, excessive stretch, and insecure anchors.
How to Use a Door Anchor
- Read the anchor instructions. Confirm the strap is compatible with your band type and the maker permits the intended anchor height.
- Inspect the door and frame. Use a solid, undamaged door with secure hinges and latch. Do not use a glass door, a loose frame, or a door that flexes under a light test.
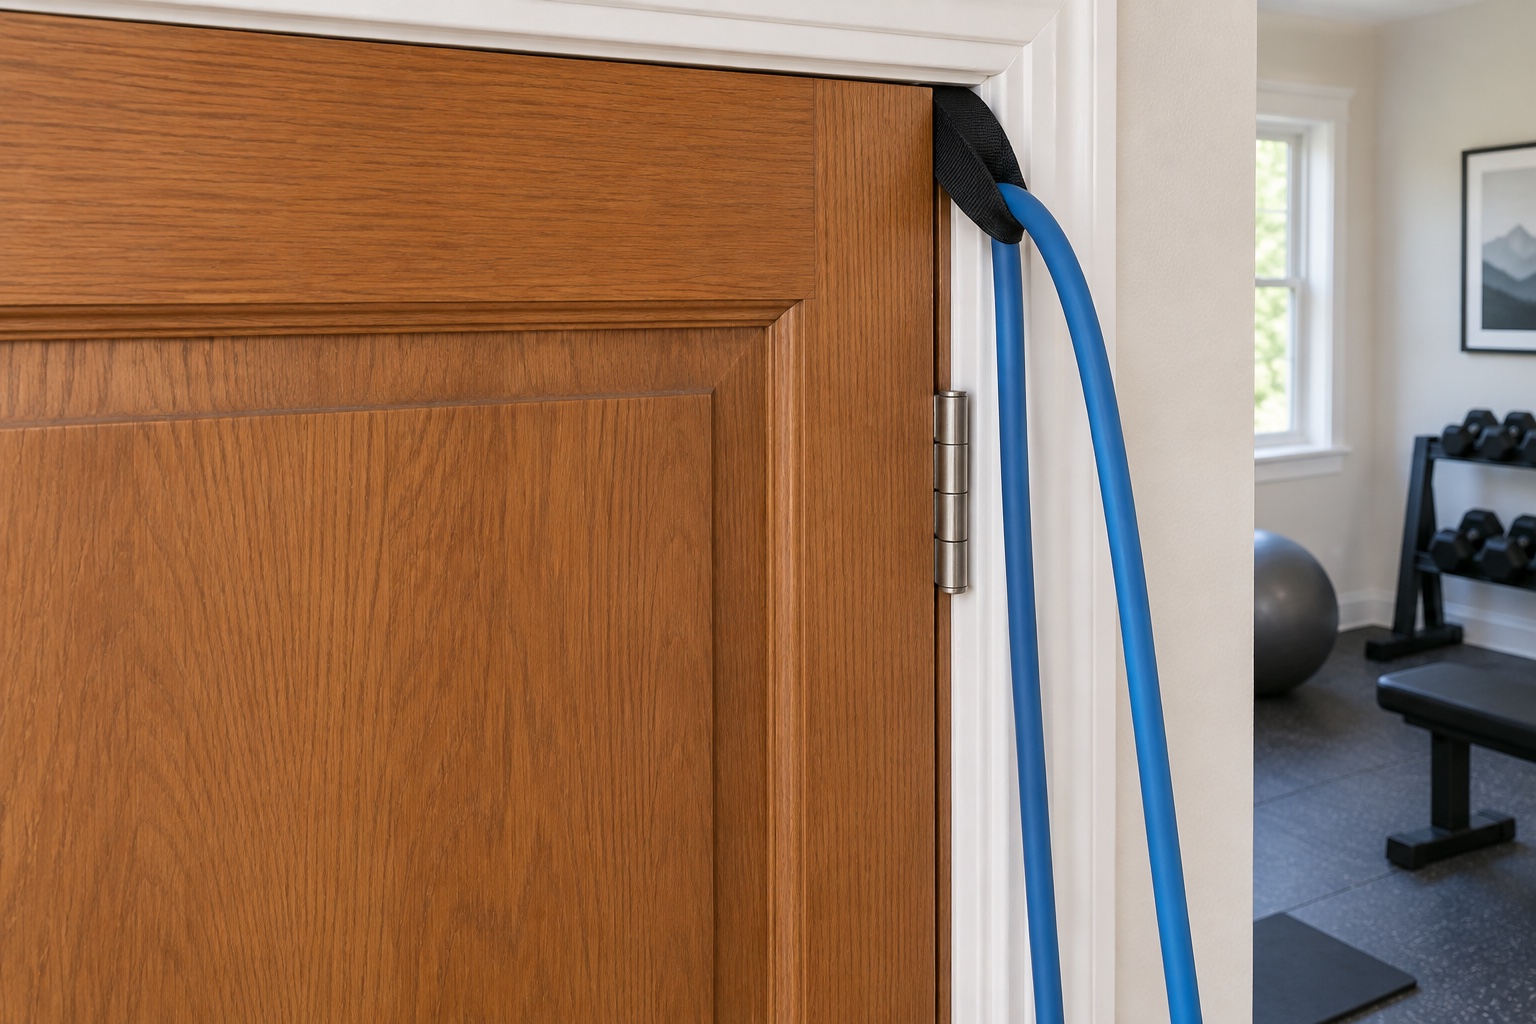
- Work from the side that pulls the door closed. The tension should draw the door into the frame, not pull it open. Lock the door when possible and tell other people not to open it.
- Place the padded stopper on the far side. Feed only the flat fabric strap through the gap at the manufacturer-approved location, then close and latch the door completely.
- Attach the band without sharp contact. Thread or clip it exactly as instructed. Do not let elastic rub directly over a metal hinge or rough edge.
- Perform a low-force tug test. Stand offset, gradually load the band, and watch the door, frame, strap, stitching, and band for movement or deformation.
- Add tension gradually. Begin farther from your usual working stretch and keep every repetition controlled on the return.
Door-Anchor Setup Demonstration
This third-party demonstration by a physiotherapist shows the basic padded-stopper setup and several anchor heights. Use it to understand the motion, then follow the instructions and limits supplied with your own anchor.
Rack, Post, and Wall Anchors
A power-rack upright or a purpose-built wall anchor can remove the risk of someone opening a door, but it introduces other checks. A rack loop should be wide enough that the elastic is not pinched or folded across a sharp edge. If a sleeve, strap, or carabiner is part of the system, use compatible hardware rated by the manufacturer.
For a wall anchor, the fastener and substrate—not the metal eye alone—determine strength. When the structure is uncertain, have it installed or assessed by a qualified professional.
| Anchor point | Use only when | Reject the setup when |
|---|---|---|
| Power rack or rig | The rack is stable or secured as designed, the contact point is smooth, and the maker permits band work | The rack can tip, the band crosses a sharp hole or weld, or hardware is loose |
| Purpose-built wall anchor | It is rated for dynamic resistance and installed into suitable structure with the specified fasteners | It is attached only to drywall, unknown masonry, trim, or damaged framing |
| Heavy structural post | The post is fixed, smooth, and cannot shift under the pull direction | It has splinters, sharp corners, corrosion, or uncertain load capacity |
| Furniture or railing | Only when the manufacturer or qualified installer has verified it for that load | It is movable, decorative, lightweight, or can rotate toward you |
Choose Anchor Height by the Line of Pull
- Low anchor: rows from a low angle, curls, resisted marches, and some lower-body patterns.
- Mid-height anchor: standing rows, presses, Pallof presses, and rotations.
- High anchor: pulldowns, high-to-low presses, and triceps extensions.
The band should travel in a clear line from anchor to hand or cuff without sawing across the door, rack, floor, or your body. Move the anchor rather than forcing an awkward joint path. Do not attach a wrist or ankle cuff unless both the cuff and band system are designed to work together.
Use a 30-Second Pre-Set Check
- Run your fingers and eyes along the band for cracks, nicks, flat spots, sticky areas, discoloration, or thinning.
- Pull lightly on handles, cuffs, clips, stitching, and the anchor strap.
- Confirm the door is latched and locked or the fixed structure is stable.
- Clear the recoil line and remove nearby sharp objects.
- Perform the first repetition at low tension and slow speed.
Do not repair a damaged resistance band with tape or a knot. Replace the damaged component. Avoid stretching farther than the manufacturer’s stated limit; if no limit is available, do not guess. Our resistance band selection guide explains the differences among tube, loop, therapy, and fabric bands.
Control the Return
Elastic resistance increases as the band lengthens, and tension can change sharply with pre-stretch, band stiffness, range of motion, and anchor geometry. Keep a stable stance, move smoothly, and return under control. If you need to lean, jerk, or step onto an unstable surface to finish a repetition, reduce tension or change position.
Stop immediately if the anchor creeps, the door moves, the band makes a new cracking sound, a connection twists, or you lose control of the return. Reinspect the whole system rather than restarting from the same position.
Sources and Manufacturer Guidance
Requirements can vary by product, model, and situation. These primary sources informed this guide; official instructions for your exact product and current authoritative guidance take priority.
Frequently Asked Questions
-
Do not treat a door handle as a universal anchor. Handles can loosen, rotate, have sharp edges, or release if the door opens. Use a compatible padded door anchor on a sound door and frame according to its instructions.
-
Use the side from which your pull draws the door closed into the frame. Close, latch, and lock it when possible. If tension would pull the door open, use a different door or anchor.
-
Yes, if the rack is stable, the manufacturer permits band work, and the band contacts a smooth surface or compatible strap rather than a sharp hole, weld, or edge. Test the setup with low tension first.
-
There is no single safe calendar interval for every material and use pattern. Inspect before every use and follow the manufacturer’s replacement guidance. Replace immediately when you find cracks, tears, abrasions, thinning, sticky degradation, damaged stitching, or loose hardware.
-
Use the maximum extension stated by the manufacturer. Band stiffness and safe elongation differ, and excessive pre-stretch raises tension and failure risk. If the limit is unknown, replace the band with one that has documented instructions.