How to Set Squat Rack Safety Arms for Squats and Bench Press
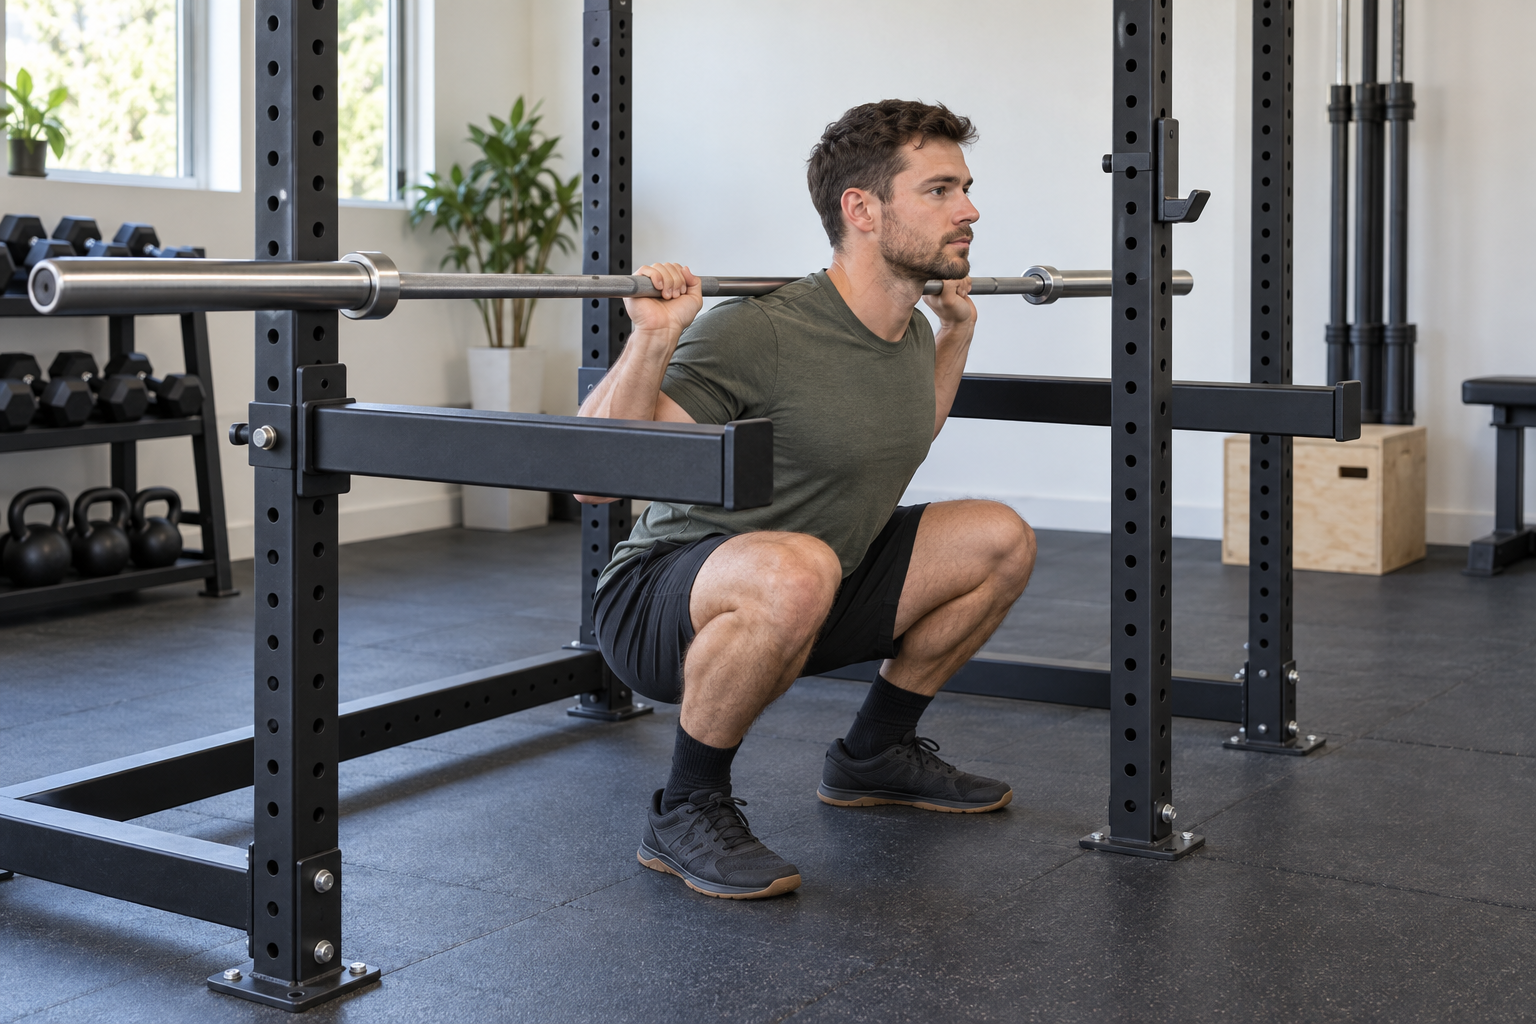
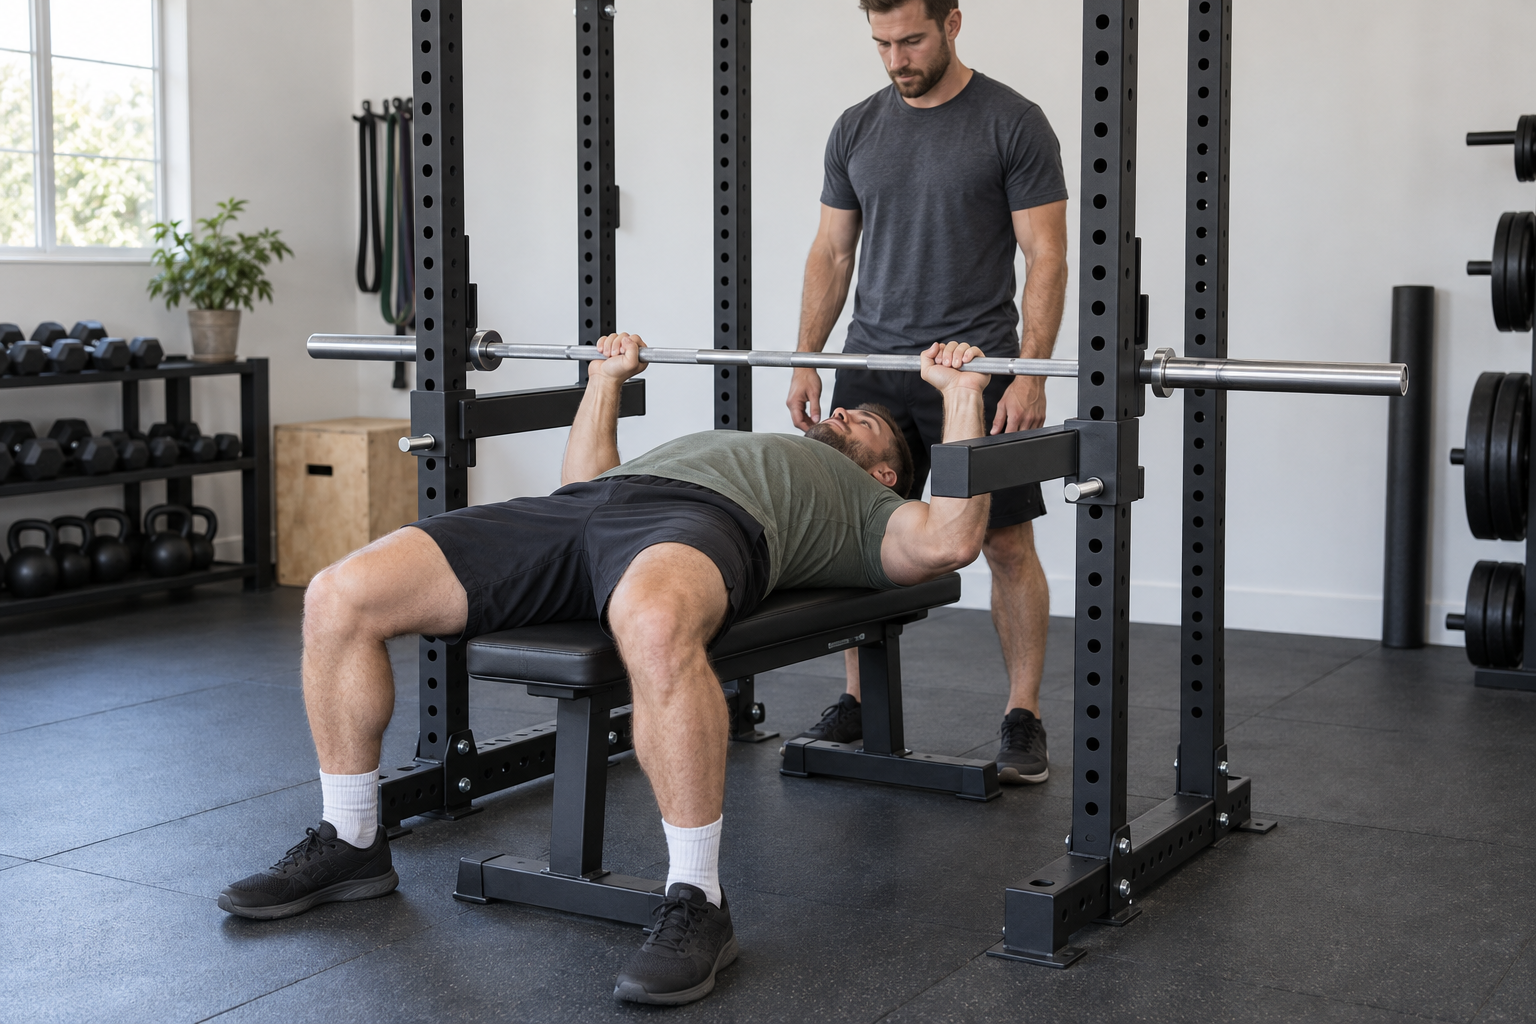
For a squat, set safety arms just below the bar at your normal bottom position. For a bench press, set them low enough for your normal chest touch but high enough to catch the bar above your throat and face when you flatten your arch.
Those are outcomes, not universal hole numbers. Body proportions, stance, bench height, arch, bar position, rack geometry, and the exact exercise all change the setting. Install the correct pair, then verify it with a completely empty bar before loading.
Before You Set the Height
- Read both manuals. Confirm the arms are approved for the exact rack model, upright size, hole diameter, and mounting location.
- Stabilize the rack. Bolt it down or install the specified feet or stabilizer. Outside-mounted arms create leverage; REP requires additional support for certain four-post setups.
- Inspect the pair. Check welds, pins, latches, liners, end stops, and the upright holes. Stop if anything is bent, loose, cracked, or missing.
- Remove nearby interference. Stored plates, cable trolleys, lever arms, and benches must not block installation or the bar's catch area.
- Unload the bar. All setup and first verification steps use an empty bar.
Install the Arms as a Matched Pair
- Face each arm in the direction shown by its manual; observe left/right markings when present.
- Seat the upper hook or channel fully around the upright.
- Swing or lower the arm into its locked position without trapping fingers.
- Insert every required hitch, detent, or locking pin completely.
- Count holes from the same rack reference point so both tops are level.
- Push and pull each unloaded arm by hand. It should not lift off, rotate open, or rock excessively.
- Confirm the bar shaft—not only a sleeve or plate—will land across both protected top surfaces.
If the pin fits only loosely, the channel does not sit flush, or a crossmember prevents locking, revisit the rack attachment compatibility checks.
Set Safety Arms for a Back Squat
- Set the J-cups for a clean unrack without rising onto the toes.
- Place the empty bar in your normal back-squat position and use your normal shoes and stance.
- Walk out to the same location you will use when loaded.
- Descend under control to your normal, technically acceptable bottom depth.
- Have a competent helper compare the bar shaft with the arms, or record a side view without changing position.
- Set both arms one usable increment below the lowest bar position.
- Repeat the empty-bar squat. The bar should not tap the arms during a correct rep.
- With instruction from a qualified coach when needed, practice the exact no-load exit method appropriate to your rack and squat style. Do not learn a bailout for the first time under load.
Set Safety Arms for Bench Press
- Place the exact bench in its final position and prevent it from sliding.
- Lie down with your normal head, shoulder-blade, grip, foot, and arch positions.
- With a spotter present, unrack an empty bar and lower it to your normal chest touch point.
- Set the arms as high as possible without the empty bar contacting them during that touch.
- Re-rack, then flatten your arch and chest while remaining on the bench.
- Gently test with the empty bar. The arms must catch it above the throat and face, with no path that lets it roll toward the neck.
- Repeat the test after any change in bench, pad angle, rack position, grip, arch, or user.
Re-Set Them for Every Exercise and User
| Change | Why the old setting may fail |
|---|---|
| Front squat vs back squat | Bar position, torso angle, and bottom path change |
| Flat vs incline bench | Bench height, pad angle, touch point, and bar path change |
| Different lifter | Torso, limb lengths, stance, arch, and preferred depth differ |
| Different shoes or stance | Squat depth and bar height at the bottom can change |
| Different bench or pad | Compressed height and body position change |
| Rack pull or pin press | Static loading and contact forces may have different product limits |
Safety Arms, Straps, and Pin-and-Pipe Systems
- Spotter arms: quick to move and useful outside compatible racks; they create leverage on the uprights and base.
- Safety straps: can be offset front to back to guide a caught bar away from the lifter, but both strap ends and the strap condition must be checked.
- Pin-and-pipe safeties: span a rack and have a simple load path, but take longer to move and must pass completely through both uprights and pipes.
- Flip-down safeties: rigid and convenient, but the exact rack width, pin engagement, and rated uses matter.
Use only the system the rack manufacturer approves. Do not combine parts from different systems to improvise a catch mechanism.
The 20-Second Check Before Loading
- Correct pair, correct orientation, equal height
- Hooks and channels fully seated
- Every locking pin fully engaged
- Rack anchored or stabilized as required
- Bar lands across both arms within their usable length
- No plates, bench parts, cables, or storage in the catch path
- Empty-bar clearance and catch tests completed for this exercise and user
Safeties reduce risk; they do not replace sound technique, sensible loading, a spotter, or the manufacturer's rules.
Sources and Manufacturer Guidance
Requirements can vary by product, model, and situation. These primary sources informed this guide; official instructions for your exact product and current authoritative guidance take priority.
- Rogue Monster Lite Safety Spotter Arms: locking pins, compatibility, and construction
- Rogue Monster Safety Spotter Arms 2.0 instructions and safety information
- REP Spotter Arms 2.0: rack stability and outside-use guidance
- REP PR-4000 Spotter Arms: anchoring, foot-extension, and flat-foot requirements
- Rogue flat-foot rack instructions: model-specific warning against safety spotter arms
Frequently Asked Questions
-
For squats, place them one usable increment below the bar at your normal bottom position, then confirm a correct empty-bar rep does not touch them.
-
They should allow your normal empty-bar chest touch but catch the bar above the throat and face when you flatten your arch. Test both positions before loading.
-
Only when the rack and arms are approved for outside use and the rack is anchored, footed, or stabilized exactly as required. Outside loading increases tipping leverage.
-
Not during a normal repetition. Repeated contact can disrupt the bar path and indicates the arms are too high, the setup has changed, or depth is inconsistent.
-
A competent spotter remains valuable, particularly for unracking, re-racking, and responding to problems the arms cannot solve. The spotter must know the lift and should not stand in the bar's catch path.