How Much Space Do You Need for a Power Rack? Measure the Working Envelope
A rack may physically fit in an 8-by-8-foot area, but many full-barbell setups work better with about 10 feet of clear width and 8 to 10 feet of clear depth. That is a planning range, not a universal minimum. The actual answer comes from your rack, bar, bench, attachments, storage, exercises, and required safety clearances.
Do not shop from the rack footprint alone. The useful measurement is the entire working envelope: every place equipment and people occupy during setup, lifting, loading, spotting, and storage.
Use Two Measurements, Not One Footprint
Start with the maximum dimensions published for the exact configuration, including feet, stabilizers, pull-up handles, plate storage, cable systems, and open lever arms.
| Room dimension | Planning formula | Include |
|---|---|---|
| Clear width | Largest of: rack width; bar length + left loading space + right loading space; widest attachment | Plate loading, collars, hands, wall storage, mirrors, and side doors |
| Clear depth | Rear clearance + maximum rack/attachment depth + front working clearance | Bench movement, walkout, spotting, bailout path, cable travel, and doors |
| Clear height | Largest of: equipment height + required top clearance; pull-up height + head rise; highest overhead movement | Joists, ducts, tracks, lights, fans, sprinklers, and door hardware |
Worked Example: An Entry Rack with a Standard Bar
REP lists the PR-1100 at 58.1 inches wide, 48.5 inches deep, and 85 inches high. Rogue lists one 20 kg Ohio Power Bar at 86.52 inches overall. If you reserve 18 inches at each sleeve for loading and your chosen plates, the width calculation is:
86.52 + 18 + 18 = 122.52 inches, or about 10 feet 2.5 inches.
For an illustrative depth plan with 24 inches behind the rack and 48 inches in front:
24 + 48.5 + 48 = 120.5 inches, or about 10 feet 0.5 inch.
Those side and front allowances are examples, not manufacturer requirements. Replace them with space proven by a dry run of your plates, bench, exercises, spotter position, and manual.
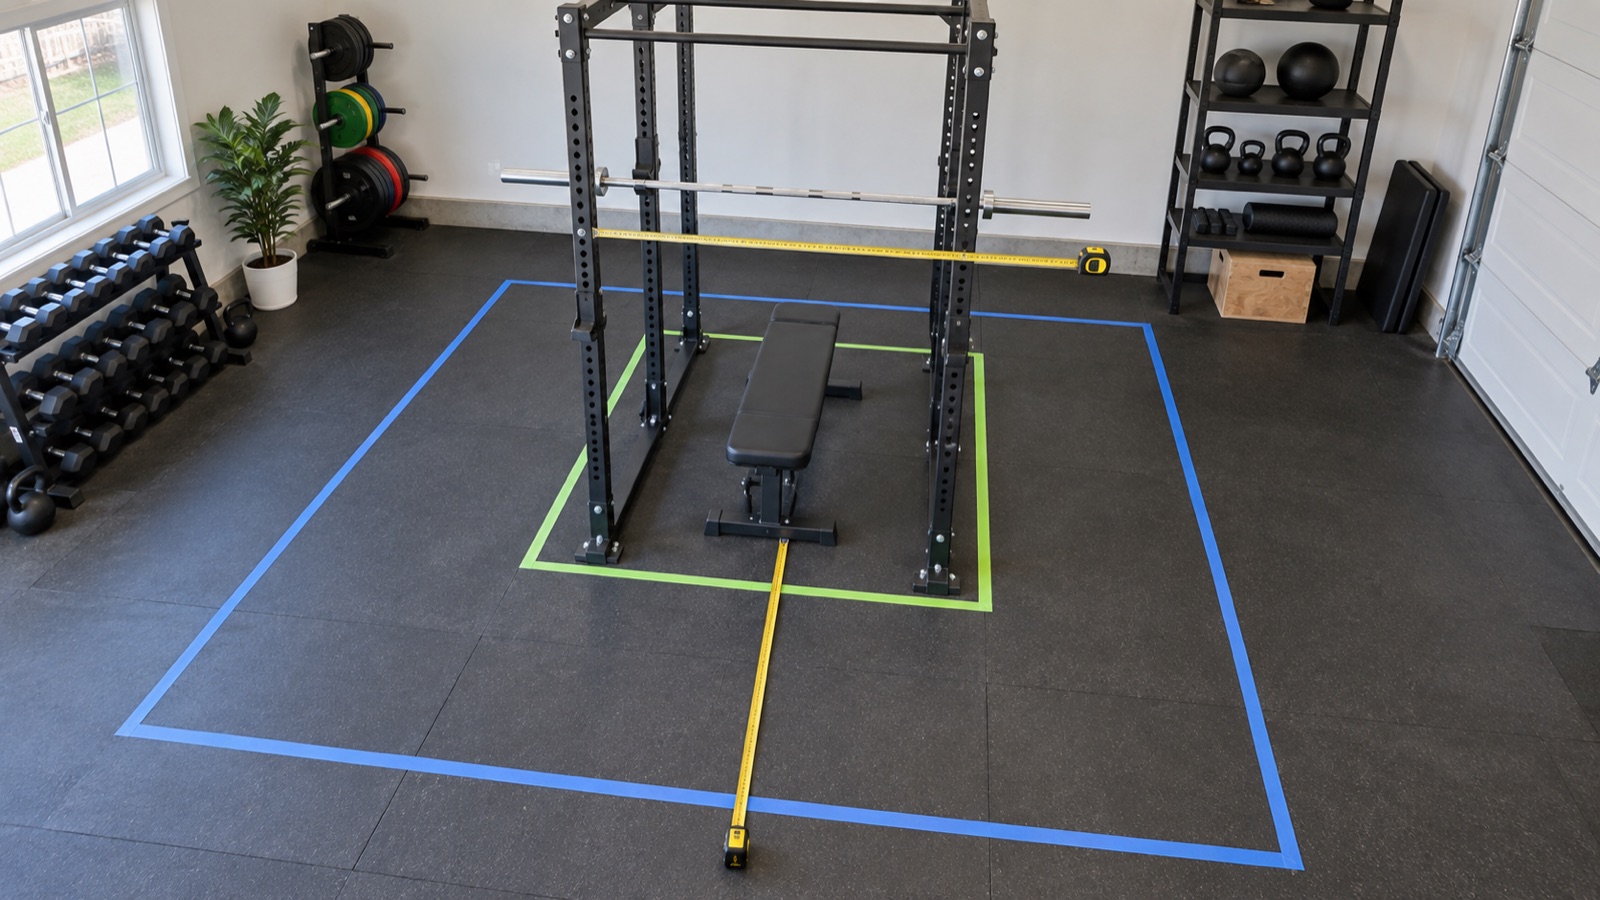
Do a Painter's-Tape Dry Fit
- Mark the rack's outside feet or stabilizer—not only the upright spacing.
- Mark the full bar length at J-cup height and at any position used outside the rack.
- Place your widest plate or a cardboard circle at each sleeve, then simulate loading it without touching a wall.
- Move the actual bench through flat, incline, decline, and storage positions you will use.
- Walk the squat setup, bench setup, spotter position, and planned bailout direction without weight.
- Open every door, garage track, cabinet, and storage system. Extend cable arms or attachments to their furthest position.
- Keep the room's exit and electrical panel access clear.
If any step depends on turning the bar diagonally, moving stored plates first, or blocking a doorway, the layout is not ready.
Different Exercises Change the Envelope
| Use | Space that is easy to miss | Planning check |
|---|---|---|
| Back squat | Walkout, spotter access, plate loading, safety depth | Can safeties be set and the bar returned without contacting storage? |
| Bench press | Bench length behind and in front of the rack | Can the bench center under the bar and roll out for other work? |
| Overhead press | Bar and plate height, not only rack height | Measure your actual locked-out top position to the lowest obstruction |
| Pull-ups | Head and hand space above and around the bar | Test grip width and top position; check ceiling fans and joists |
| Landmine | Diagonal bar sweep and plate arc | Tape the complete arc with the largest plate installed |
| Cable or lever arms | Handle travel, open arms, and moving weight horns | Use maximum published dimensions in every intended position |
If the Room Is Smaller Than the Working Envelope
- Choose a short-depth or wall-mounted rack only after accounting for its open position and mounting structure.
- Use a shorter specialty bar only if it is compatible with the rack's J-cup spacing, plates, collars, and intended load.
- Move plate storage away from bar-loading sides rather than squeezing the sleeves against a wall.
- Choose a bench whose total length and wheel/handle placement work in the room.
- Reduce attachments. A compact rack with unused cable wings can consume more space than a simple full rack.
Never solve a tight layout by removing required safeties, blocking egress, or accepting contact between the bar and walls.
Sources and Manufacturer Guidance
Requirements can vary by product, model, and situation. These primary sources informed this guide; official instructions for your exact product and current authoritative guidance take priority.
Frequently Asked Questions
-
Some compact racks can, but a standard bar leaves very little side-loading space in an 8-foot width. Draw the working envelope and dry-fit the bar, plates, bench, and exercise paths before deciding.
-
There is no universal distance. Follow the rack and attachment manuals, then add enough access for anchoring, inspection, plate storage, cable travel, and the exercises performed behind or inside it.
-
Many 20 kg bars are approximately 86.5 inches long, but specialty and women's bars differ. Use the published overall length of the exact bar, then add plate-loading clearance on both ends.
-
Possibly—for stabilizers, plate storage, cable systems, anchoring, inspection, or exercises. A rack with nothing protruding may sit closer when its manual permits, but do not make bolts or required access unreachable.
-
Yes. Confirm upright series, hole spacing, crossmember position, maximum attachment dimensions, moving paths, and storage. Compatibility does not mean the attachment fits your room.